

Out of Control is a recurring series written by Nick Gonsman of ETC NYC. Each installment aims to shed light on an aspect of the theory and practice of entertainment lighting control. Today’s topic: navigating your Eos Magic Sheets.
Build good habits with Magic Sheets.
The Magic Sheet suite in Eos® Family software is a simple, yet comprehensive set of tools that allows you to tie every facet of your show file to your workflow – from custom displays to programming surfaces and much more. And while there are hundreds of tricks that make Magic Sheets purr, I think some of the most powerful (and simplest) enhancements are the thoughtful deployment of navigation tools.
In setting up a show file with Magic Sheets, there are a few habits that can keep your navigation between sheets smooth. Things like dealing with aspect ratios and zoom levels, keeping sheets separate, and tying in a menu structure can all have you speeding through tech – when wasted seconds can really add up.
These aren’t the displays you’re looking for…
One of the great things about Magic Sheets is that you don’t need to be at a console to create or manage them. But a major challenge in working offline in Nomad is that the device you are using will doubtlessly have different resolutions or aspect ratios than the console or RVI on which you will actually be using the Magic Sheets. So what’s a programmer to do?
Set boundaries for yourself.
I’ve been trying to do this in my life for years, with little avail. But in the world of Magic Sheets, they can save you a lot of time. Aspect ratios of displays are just that – ratios. So the 16:9 or 4:3 display that will be hooked up to your Eos device can be mimicked in a Magic Sheet, regardless of the resolution of your working display, or the destination. My base file has a blank Magic Sheet with just aspect ratio boxes – with grouped lines – for easy copying:
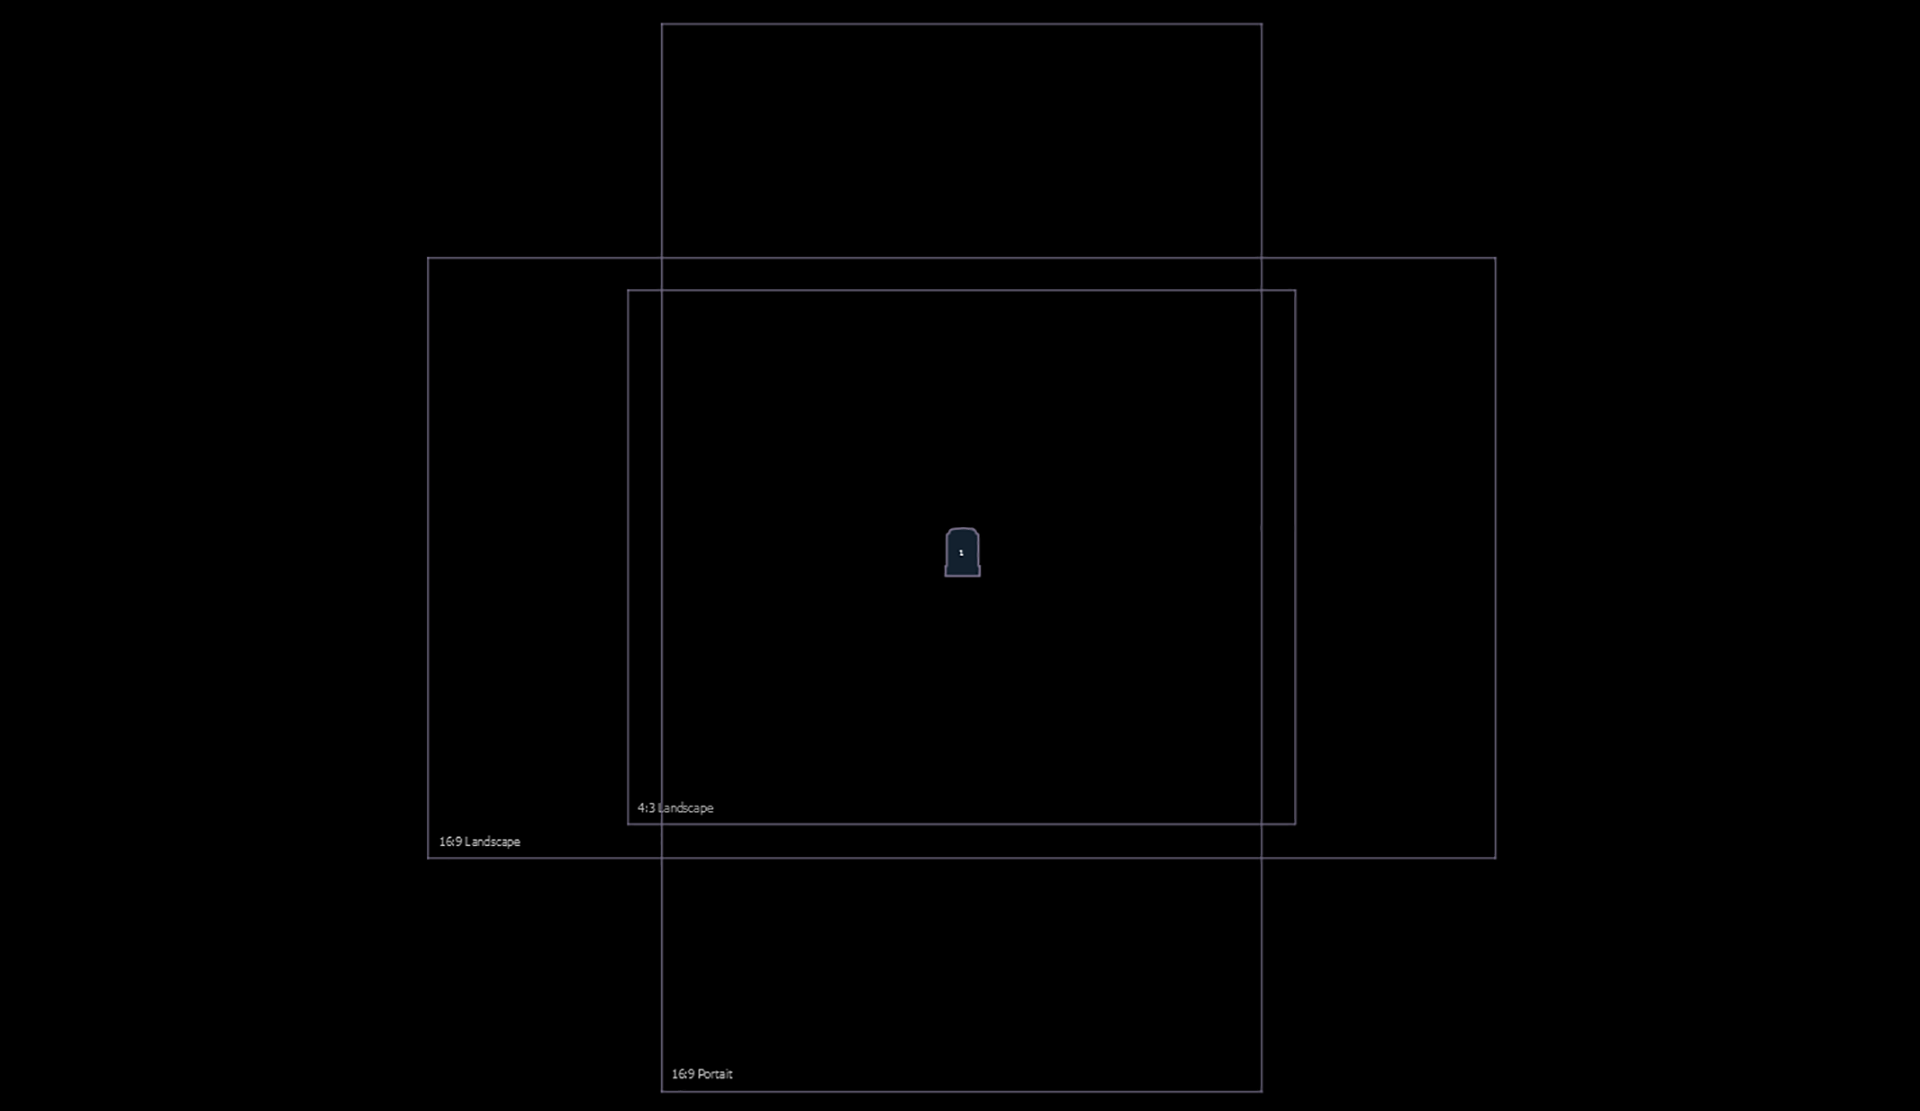
As the Magic Sheet suite doesn’t have a scale, it can be hard to decide which sizing can be right. In my experience, I have found that using the native resolution of a 16:9 HD monitor works great – 1920W x 1080H (I have placed a fixture in the center of the sheet, unchanged, for scale). But for 4:3, a size of 600W x 480H ended up being too small to be useful – I was always scaling everything down. In the example above, I doubled the box to 1200W x 960H – making it useful with the native scale of objects in Magic Sheets.
I also keep templates of common screen splits, so I can quickly build a magic sheet to fit a particular portion of a screen:
When I start a new show file, I simply merge in these Magic Sheets from my base file. Then, I can copy the ratios I know I’ll be using, and delete the ones I won’t. I can now construct my 4:3 Magic Sheet on my 16:9 laptop, with errant disregard:
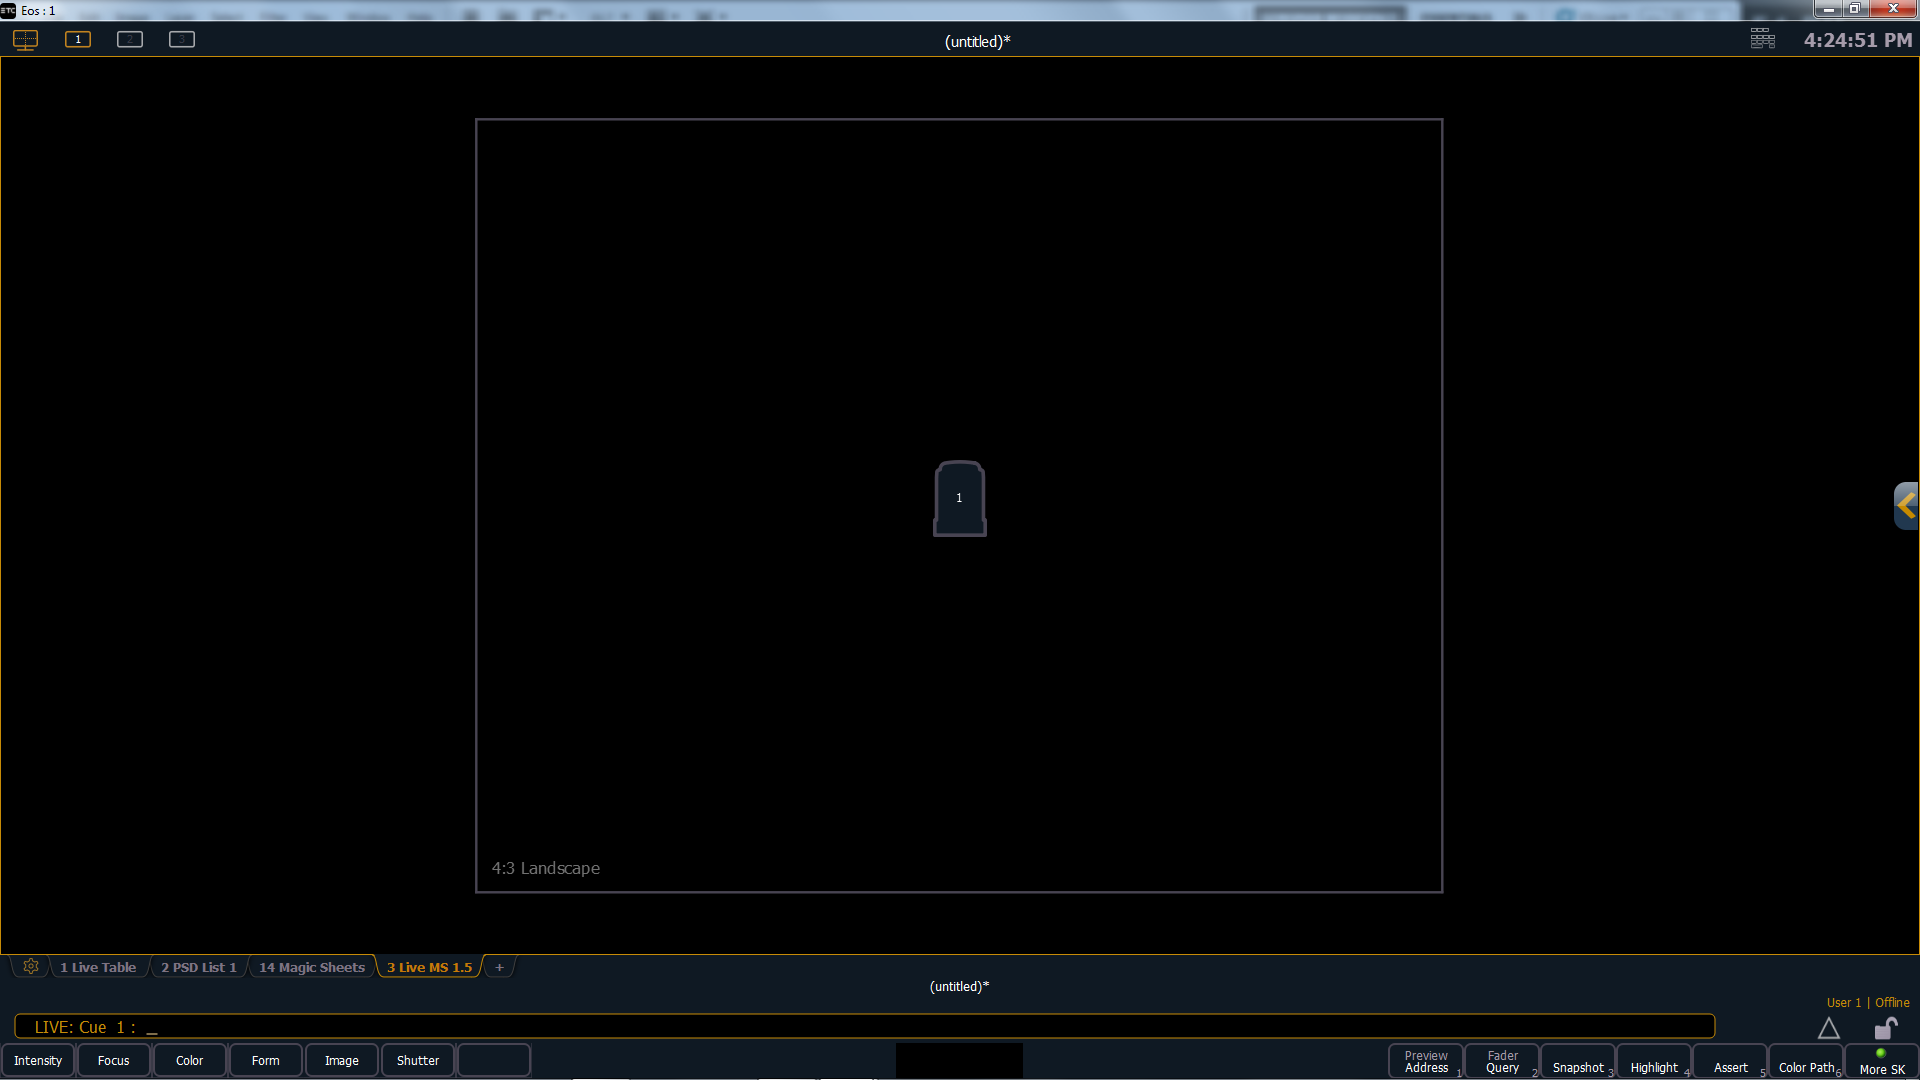
My Magic Sheet is built – let’s delete those boundaries.
Not so fast. One of the secrets of Magic Sheets is that typing {Magic Sheet} [1] [Enter] – or having a macro call the command – uses the Zoom To All function to load the Sheet in the tab. And if you’ll be bopping around between Magic Sheets, this can be pretty handy.
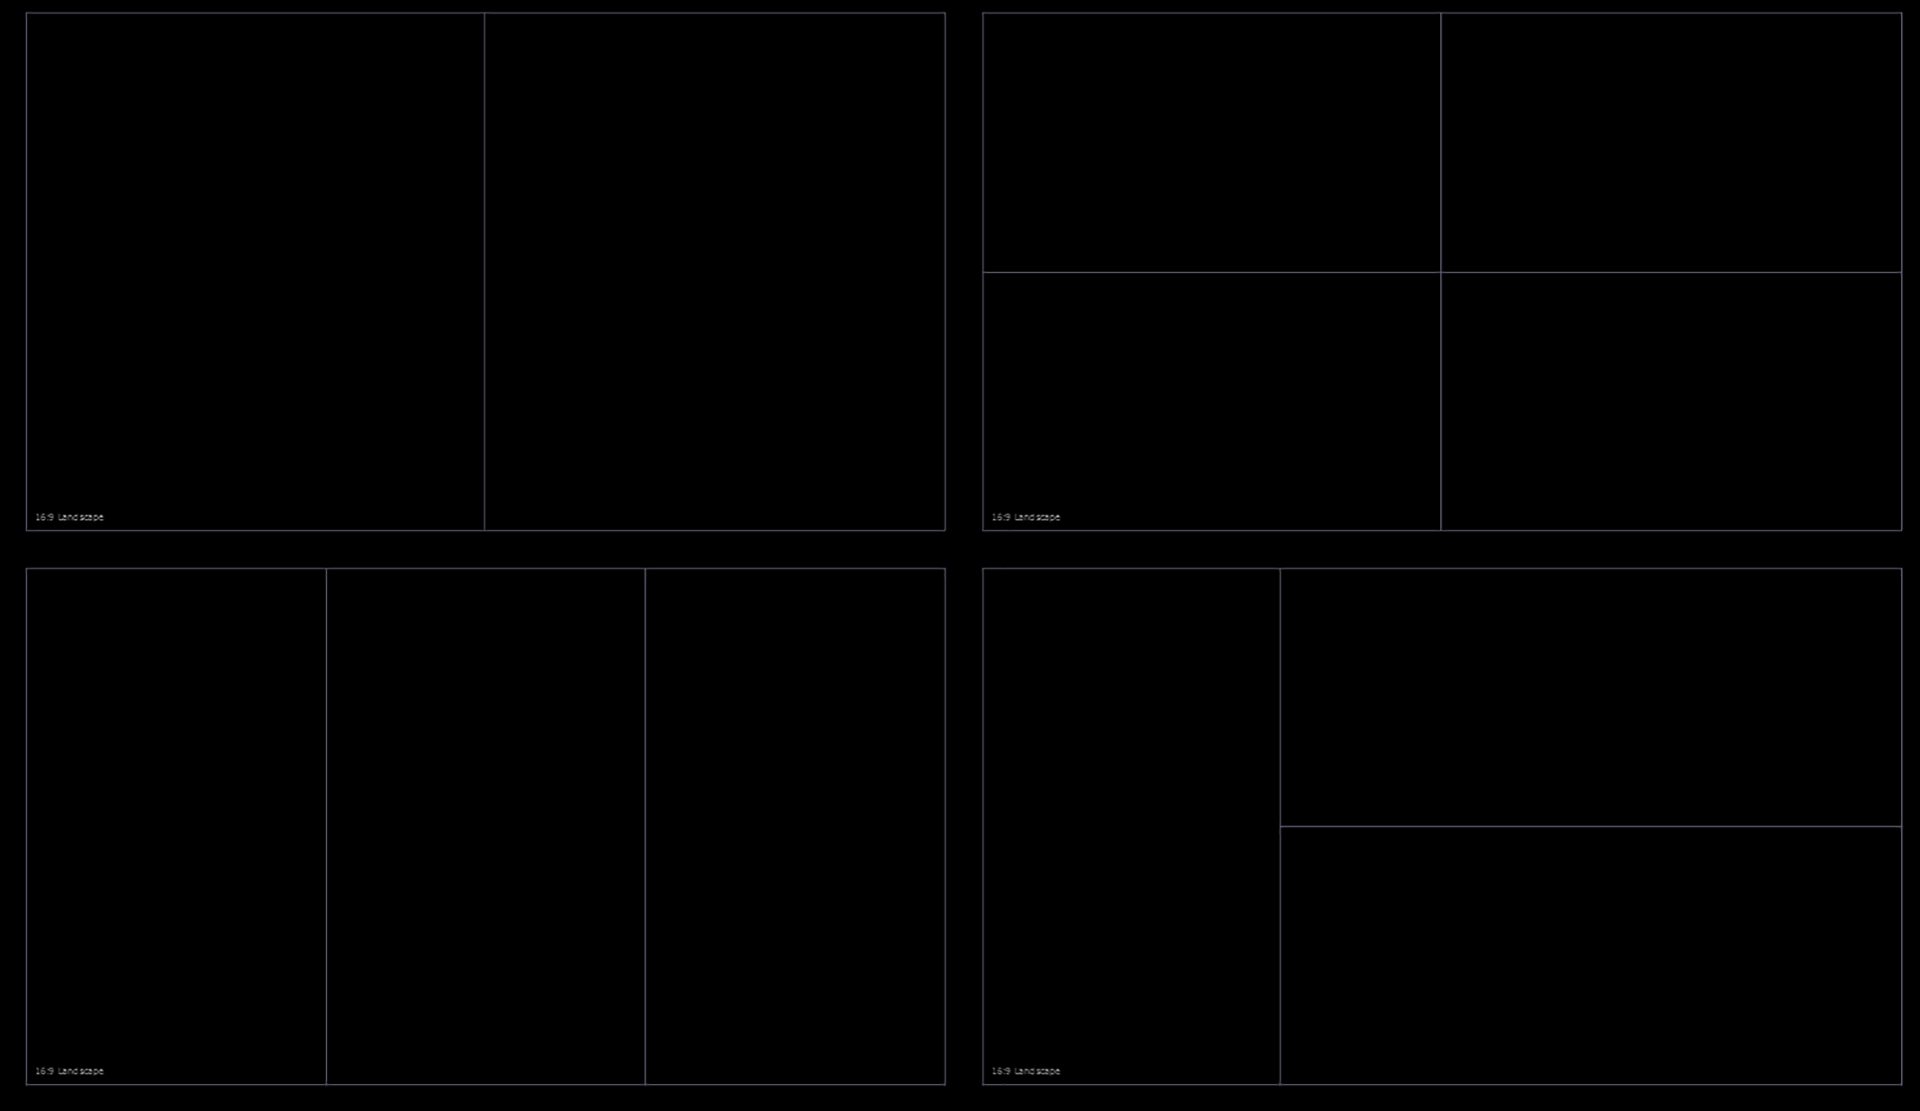
By keeping the boundary box, and all of your sheet’s content inside, you can be assured that the scale between Magic Sheets is always the same. Why do you care? Let’s look at the show file from the new and wildly hilarious drawing room farce I am programming: “Oversimplified Examples.”
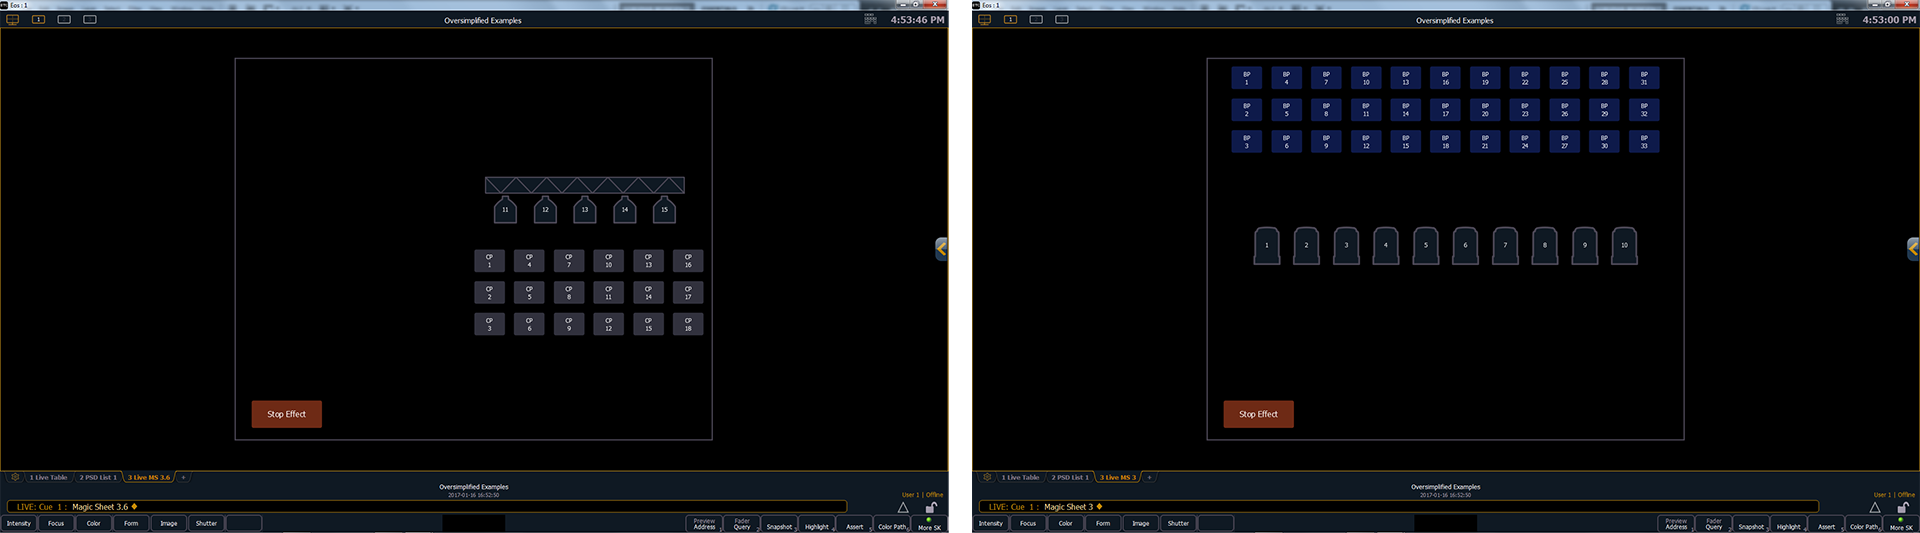
In the above examples, I kept my boundary, and all Magic Sheet objects inside. When I move from one sheet to another and Zoom To All is deployed, the scale of my objects (buttons and fixtures) stays the same, and things like my “Stop Effect” button – which I want in the same place on both Magic Sheets (an important concept for a menu structure) – stay where I want them.
When I delete my boundaries, Zoom To All finds the objects themselves, not the boundary. And my scale and object location between the two sheets are massively different:
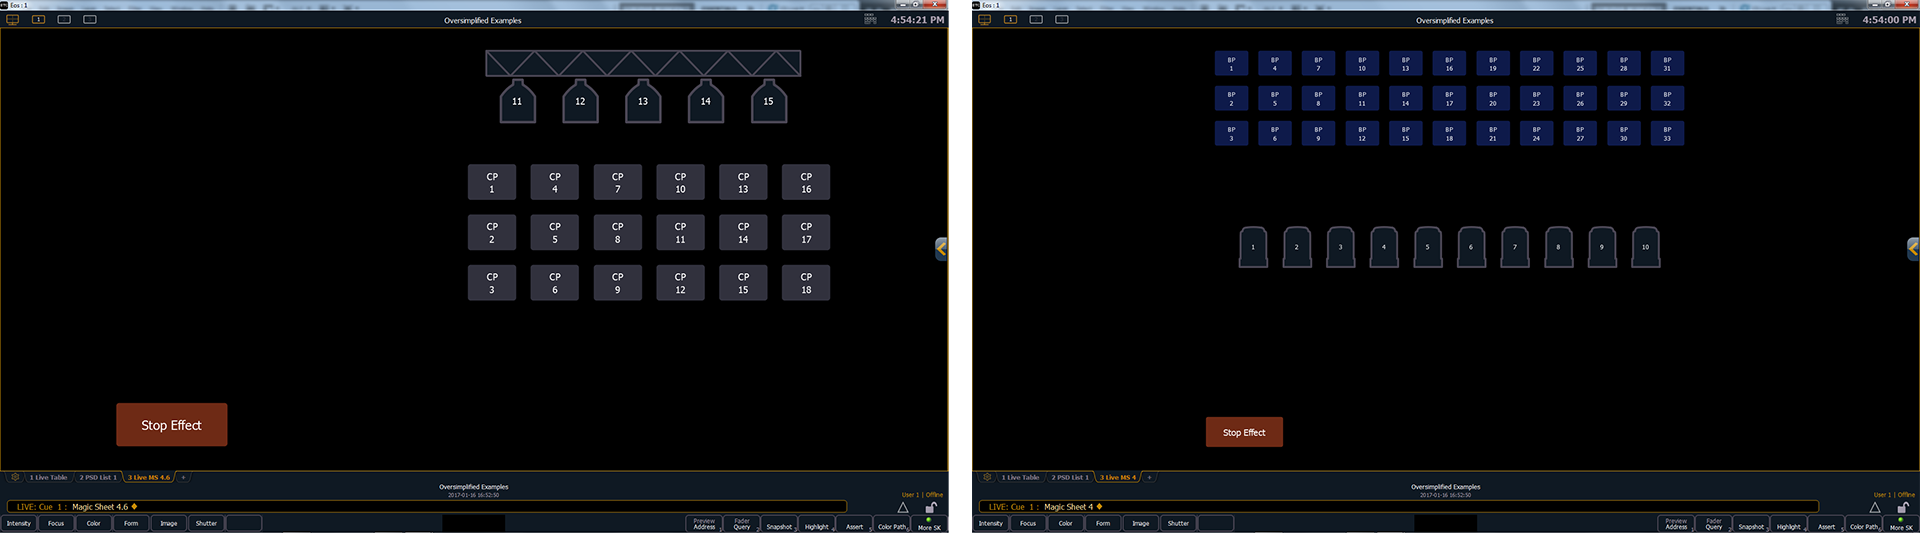
As a programmer in the heat of battle, this drives me crazy. “Why is the @#$& button not where I put it!?!?” Keeping your boundaries assures scale and button locations can be preserved sheet to sheet.
I like to put all my layouts on a single sheet, and use views.
There are always two ways to skin a metaphor in the Eos Family software. This will of course work, but I tend to avoid it in my own programming for a few reasons.
The first seems silly, but I run into it all the time. What happens when you start calling that Magic Sheet without addressing the view? What if you call it on a different resolution or aspect ratio monitor (think console versus RVI, internal versus external monitors)? The software will deploy Zoom To All, and you will need to either recall the sheet and view you want, or try to manually zoom. Both eat time – and that is usually the one thing lighting teams do not have.
The second thing is that multiple views on the same sheet are impossible with menu structures. Let’s look at our two example pages on one sheet:
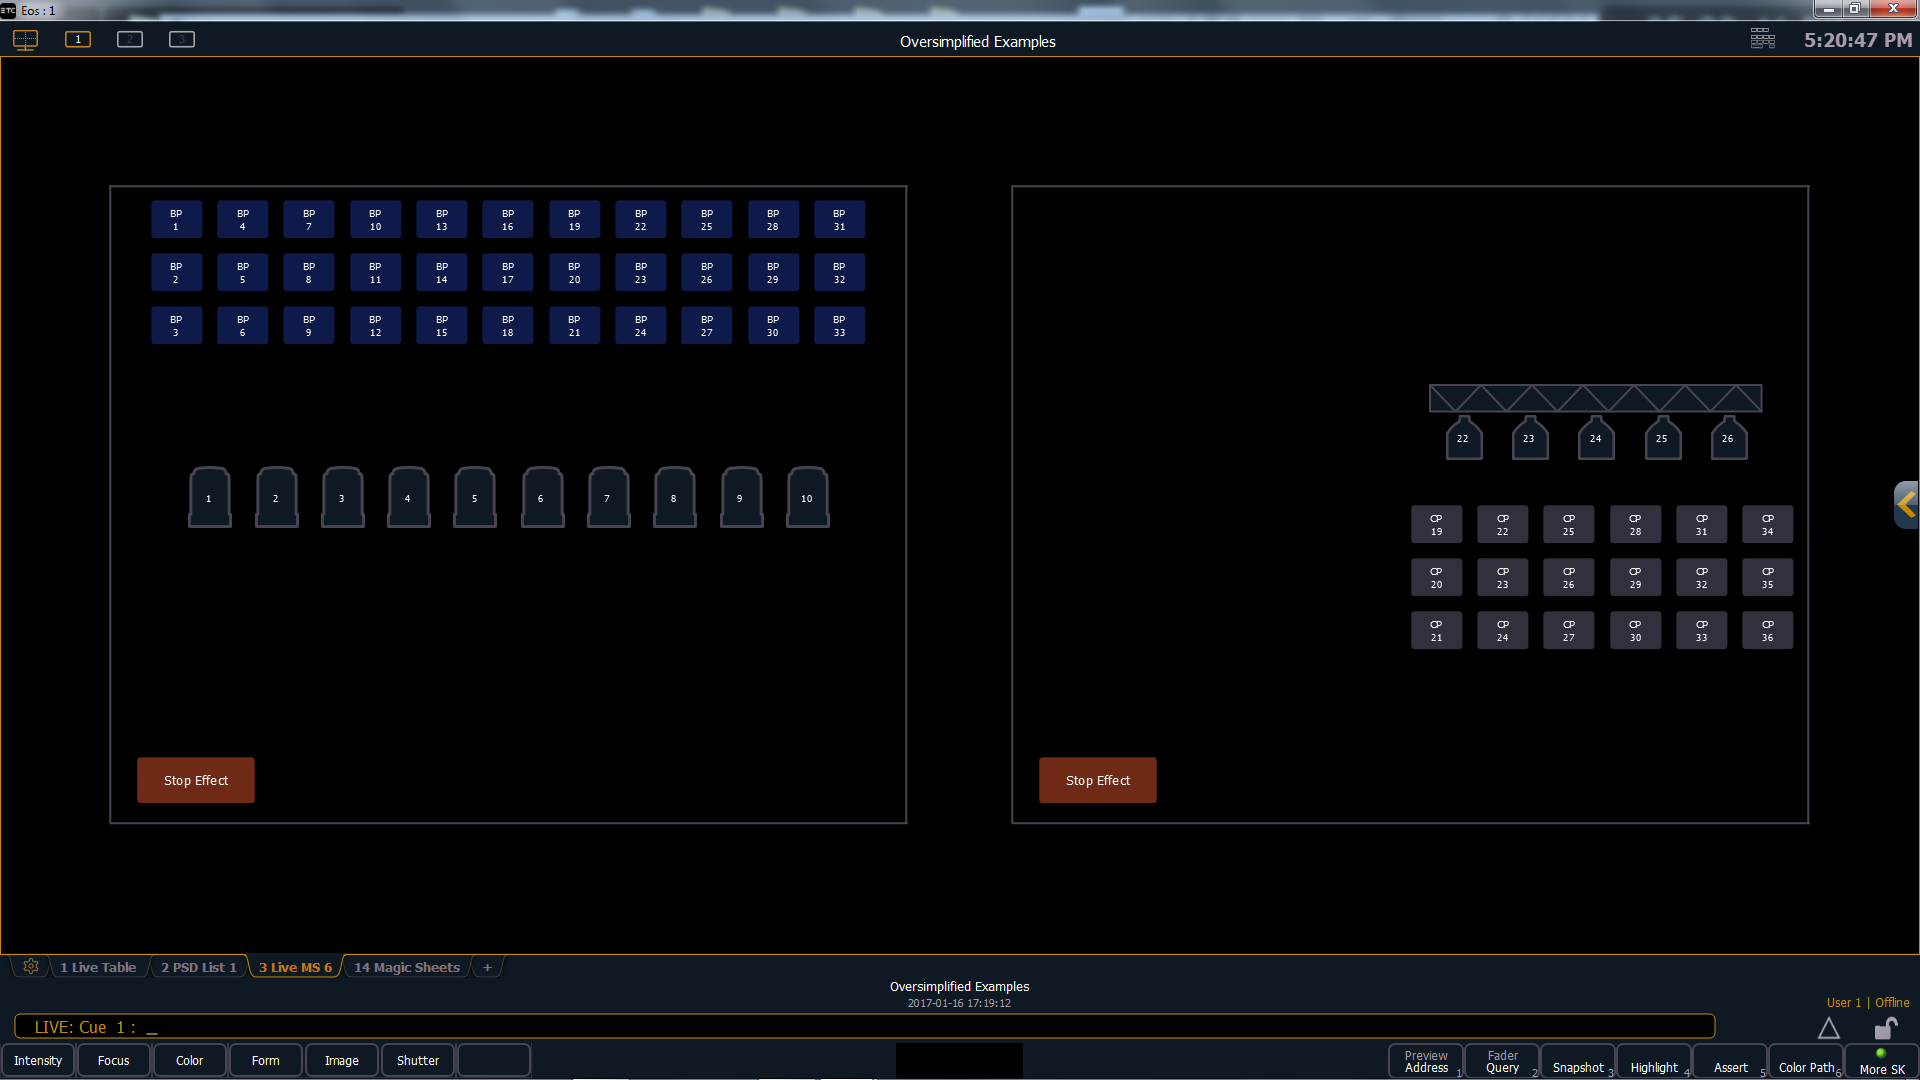
This is all well and good functionally, but if you try to zoom in to each page, and get it in the same position as all the other pages as their zooms, you will drive yourself batty. Inevitably when you call View 1 or View 2, your buttons that are supposed to be in the same place will move – even by just a few pixels. For me, it is an unnecessary distraction when I should be concentrating on what the design team needs. As your Magic Sheets get more complex, putting a single page’s worth of content on each sheet – and letting the desk do the heavy lifting – will save you hours of psychiatry bills (and more importantly, tech time).
Tell me about these menus you keep waxing on about.
As you know, screen real estate is precious. While programming, you only want to change what you want to change on your displays – and nothing else. For this reason, I have started placing my Magic Sheet tab in a single place, and using a menu structure to change which sheet that tab is displaying.
Similar to the Stop Effect button in previous examples, I want my menu to appear in the same place on the screen, regardless of which Magic Sheet I have up. The easiest way to do this and keep it accurate is to create those buttons in my boundary box, and copy the Magic Sheet. It looks something like this:
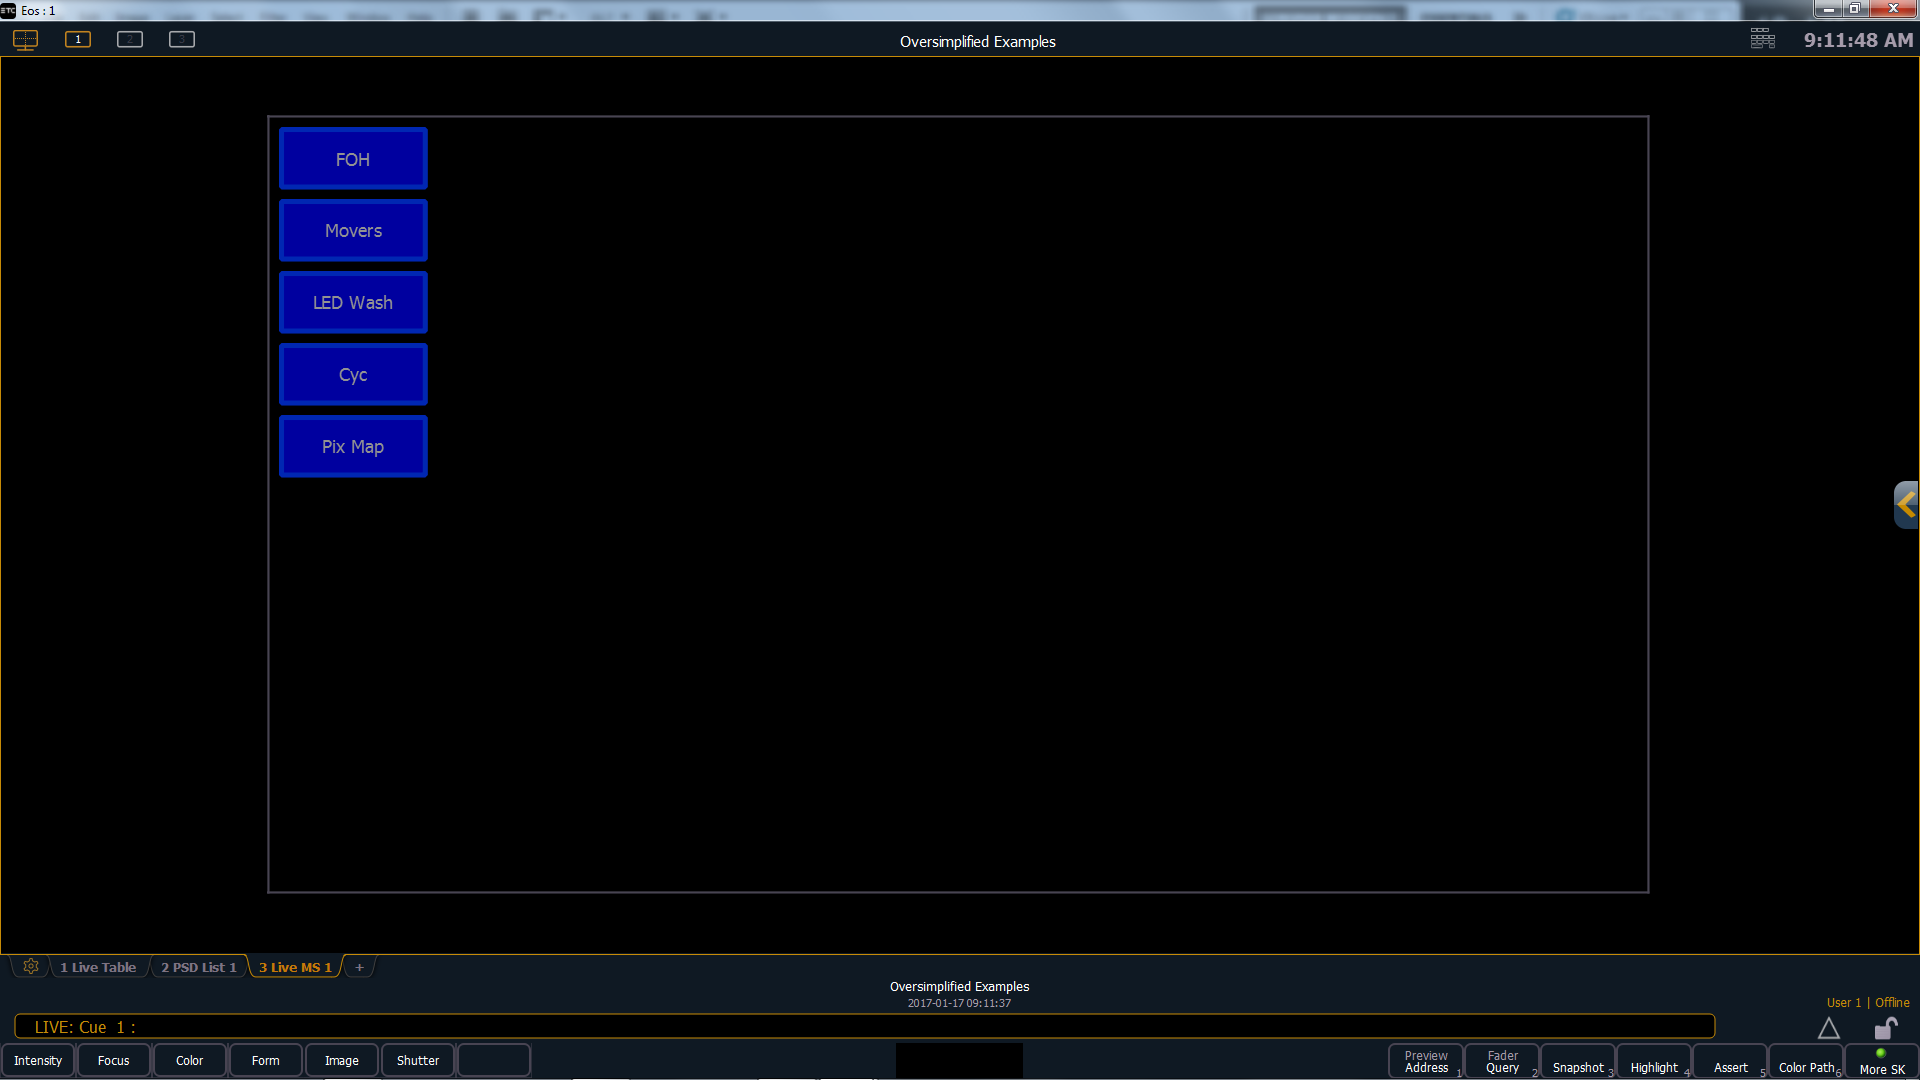
Each button can call a Magic Sheet or a macro that fires the Magic Sheet (I do the latter – a background macro won’t interrupt the command line). Once you have the menu you want, simply copy that Magic Sheet to the other locations, and build your content on each sheet. Voilà!
Outro
Well-implemented navigation can take Magic Sheets from unpredictable, disparate items to a sleek and efficient user experience. This post covered some simple examples, but you can get fairly complex with a bit of toying around. And using Nomad offline – you can build the Magic Sheets of your dreams – all in your bunny slippers.
Like what you saw? Did I mess something up? Got something you want to know more about, or have a tip to share? My inbox is always open: nick.gonsman@etcconnect.com.

%20(1).jpg)